Introduction
Generally, the connection between the HMI and the computer is established using a USB type B cable for uploading and downloading. For this, the user must configure the HMI according to the different types of operating systems.
1.1 Reinstalling the USB Driver
To reinstall the USB Driver, in DOPSoft 2.0 or DOPSoft 4.0, access the Options> Enviroment menu.

Make sure that in Upload / Download the USB option is selected.
1. First, click on Unistall IHM USB Driver. This procedure is quick and will not present any information.
2. Then click on Reinstall IHM USB Driver. Follow the steps in the installation window until the driver installation is complete.
For DOP-B series HMI
In DOPSoft 2.0, go to Options> Configuration> Others> USB Download.
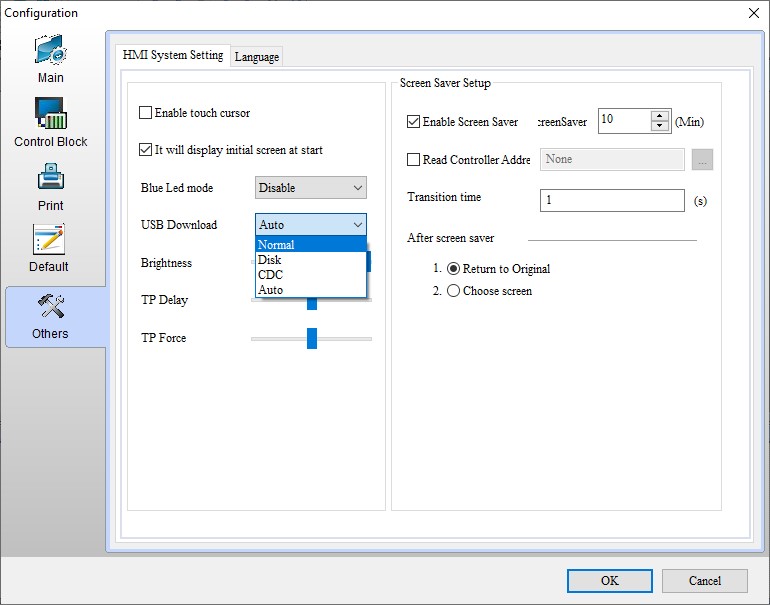
1. For Windows XP, the upload / download mode must be set to 0 (Normal Mode).
2. For Windows 7, 8 or 10, the upload / download mode must be set to 1 (Disk Mode).
3. If USB permission is restricted, set to mode 2 (CDC Mode).
4. There is an automatic detection mode (Auto) that automatically detects the connection mode.
Note: For Windows 10, CDC mode is the most recommended.
If the connection between the HMI and the computer is not established before the project starts, it will not be possible to download or upload the new settings. In this case, the user has to configure the system by pressing the system menu from the back of the HMI. Please follow the steps below.
1. Press the system menu button on the back of the HMI for 2 to 3
seconds. When the button is pressed, the bell will respond with a
beep as notification. For DOP-B models that do not have a button
at the rear, with the HMI on, press
any corner of the screen for a few seconds until you hear the beep. After the beep, press
the upper left corner of the HMI.
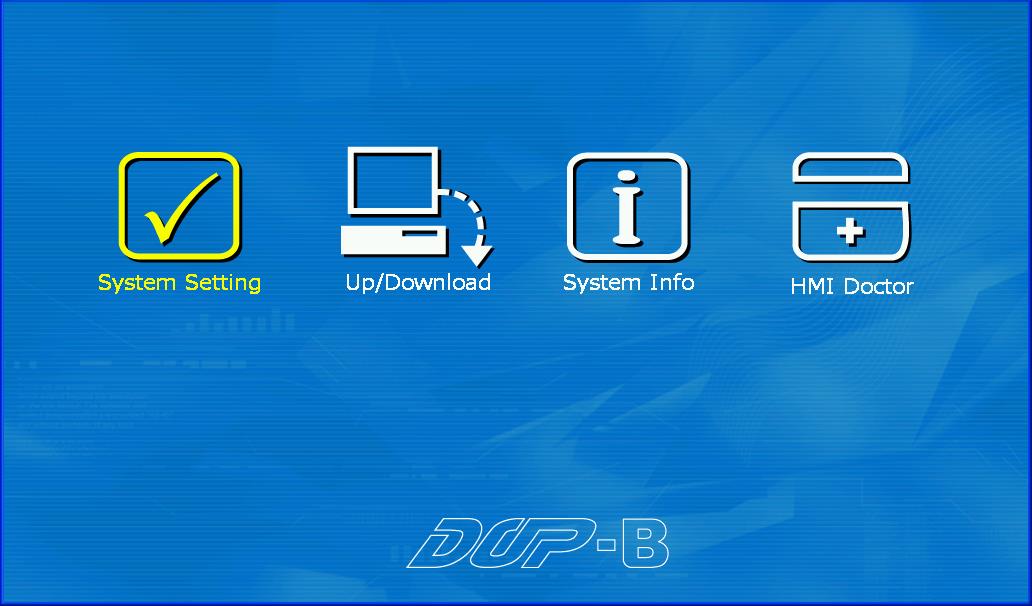
2. When entering the HMI system menu, press the screen to enter the System
Setting> Misc. > USBCommMode and set the mode to 0 or 1 or 2.
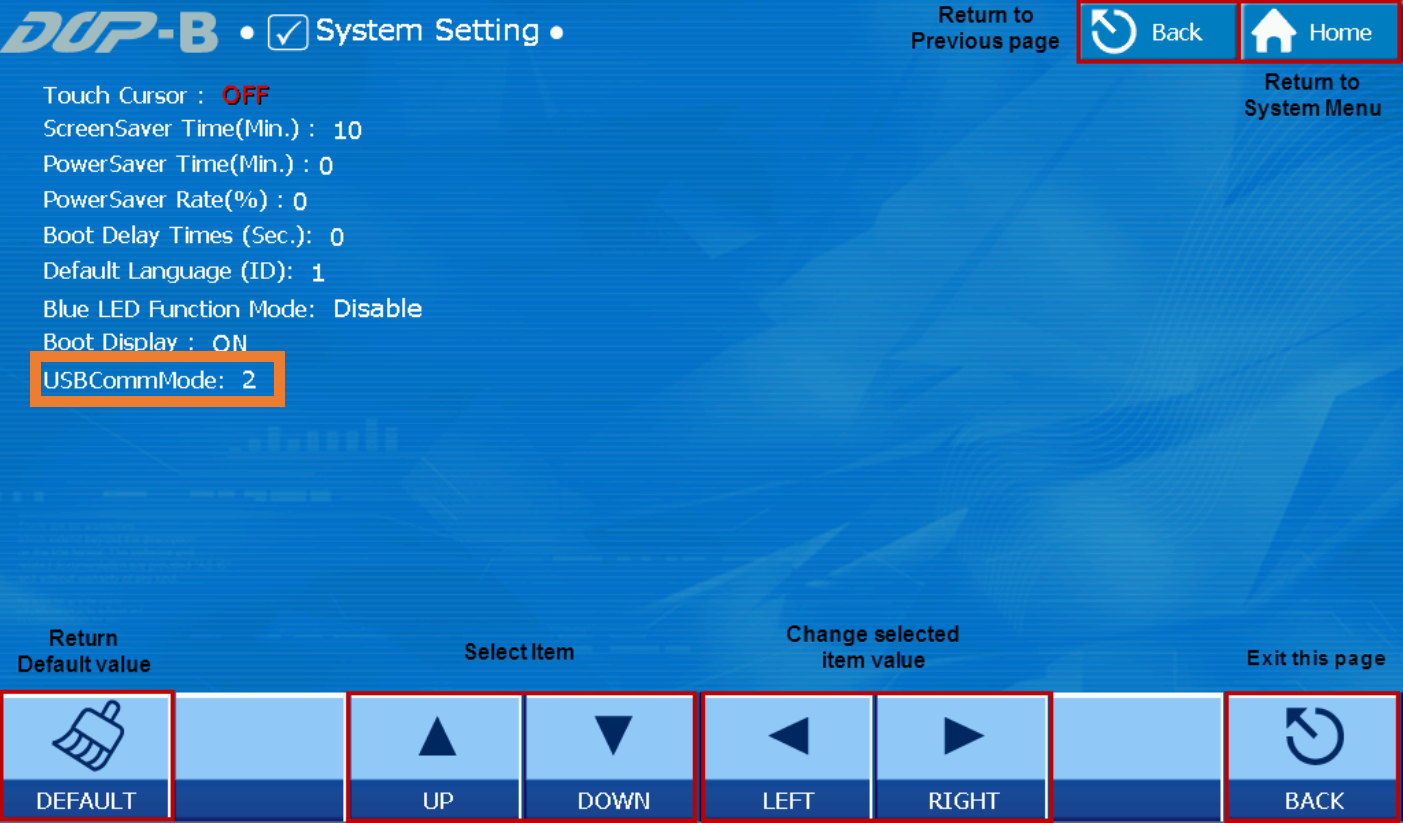
3. After setting up, press the upper right corner to return to the
HMI project.
note:
The DOP-B05S100, B05S101, B07S201 and B07S211 models do not have the option of
CDC communication (2) are therefore not compatible with Windows 10. In this case,
it is recommended to use a virtual machine or a PC with Windows XP SP2.
For DOP-100 series HMI
In DOPSoft 4.0, go to Options> Configuration> Others> USB Download.
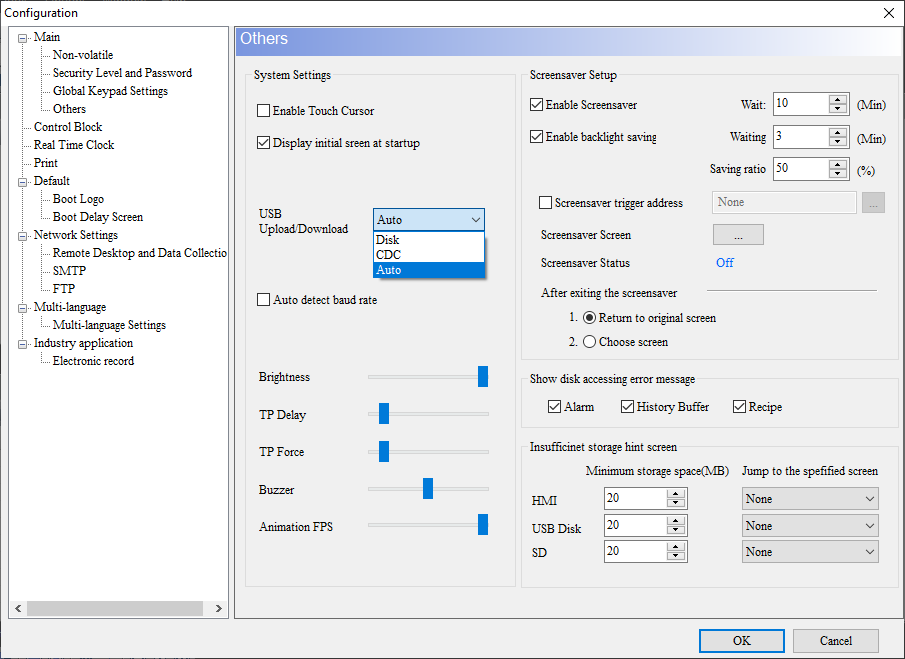
1. For Windows 7, 8 or 10, the upload / download mode must be set to 1 (Disk Mode).
2. If USB permission is restricted, set to mode 2 (CDC Mode).
3. There is an automatic detection mode (Auto) that automatically detects the connection mode.
Note: For Windows 10, CDC mode is the most recommended.
If the connection between the HMI and the computer is not established before the start of the
project, you will not be able to download or upload the new settings. In this case, the user has to configure the system. Please follow the steps below.
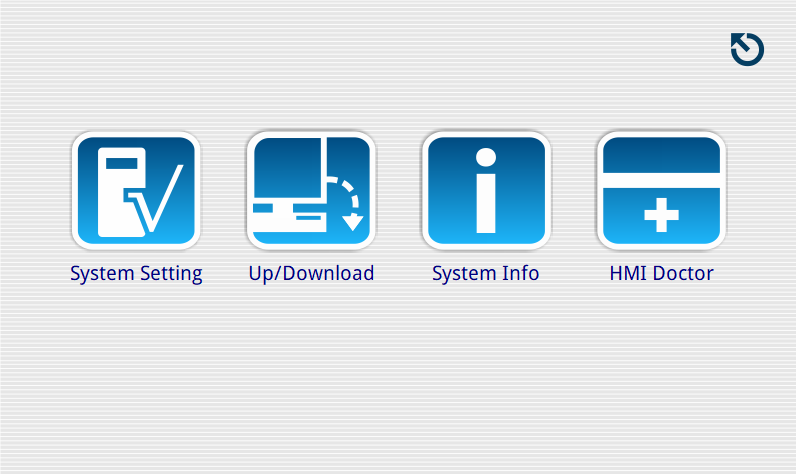
1. To access the system, press on a blank space on the screen for more than 3
seconds. After that you should hear a ringing sound. After hearing the
bell sound, press the upper left corner within 1 second
to enter the system screen.
2. When entering the HMI system menu, press the screen to enter System Setting> Misc. > USB Comm. Mode and set the mode to Disk or CDC.
Note: For Windows 10, CDC mode is the most recommended.
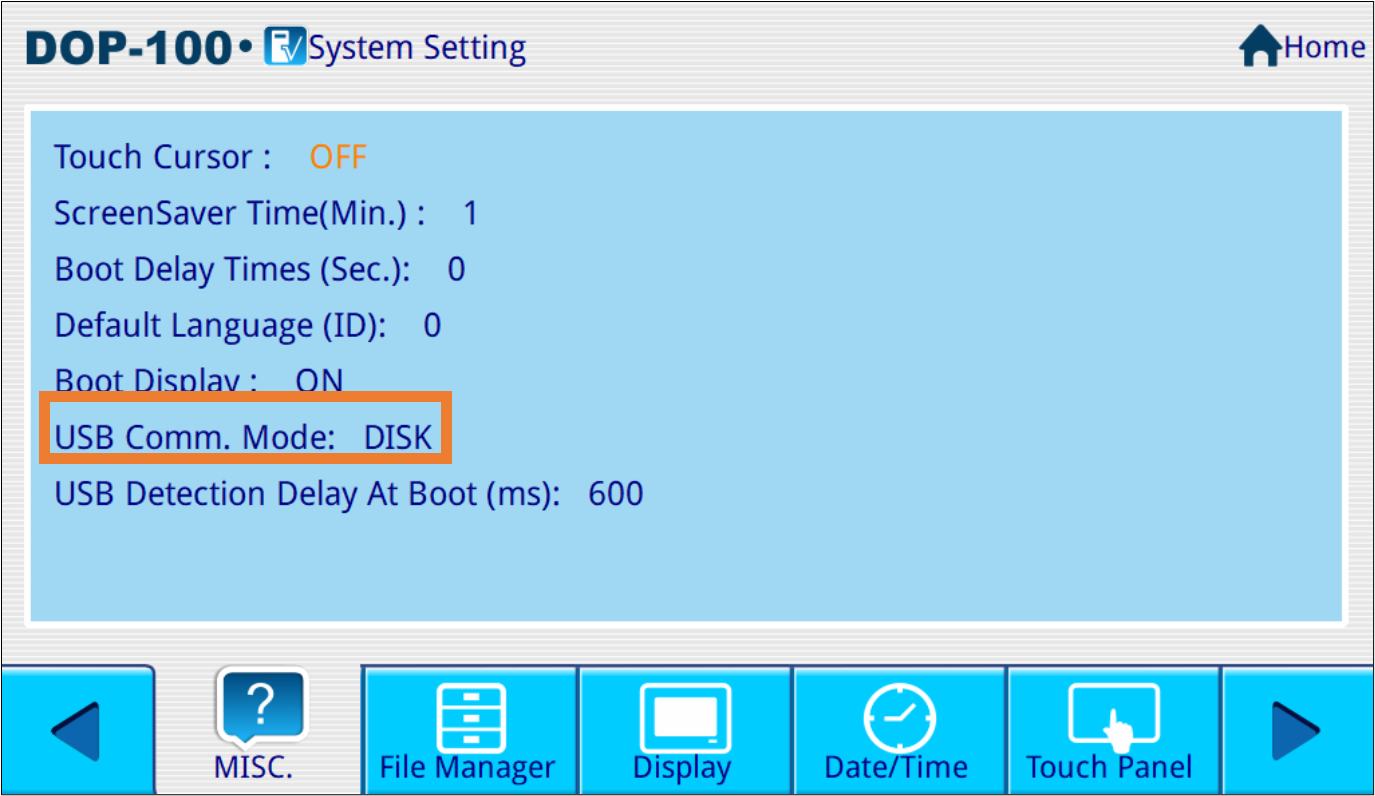
3. After setting, press “Home” and then the upper right corner to
return to the HMI project screen.